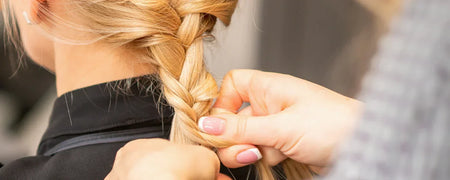
Tips for beginners: Maintaining a firm grip on each section of hair is essential for keeping the braid even and secure. Consistent tension will ensure your braid looks neat and polished. When braiding the back of your hair, use a mirror to help monitor your progress and maintain symmetry. Beginners may find it helpful to start with smaller sections or practice on someone else's hair first, as this builds confidence and improves hand coordination. Over time, your technique will become smoother, making the braiding process faster and easier. Patience and practice are key to mastering a well-executed braid.
Common mistakes to avoid: Uneven sections at the start can lead to an unbalanced braid that may unravel or appear lopsided. Loose braiding or inconsistent tension can make the braid look messy. Make sure to detangle hair completely before beginning to avoid knots during braiding.
How to french braid your own hair: Single french braid
The single French braid is a timeless style that starts at the crown and gradually incorporates hair from both sides, creating a sleek, woven effect down the back of the head. This versatile braid is perfect for keeping hair out of your face during daily activities or for a polished look on special occasions. Mastering the technique may take some practice, but it offers a practical and elegant option for all hair types and lengths. With patience and consistent tension, you can achieve a beautifully uniform French braid.
Step-by-step instructions:
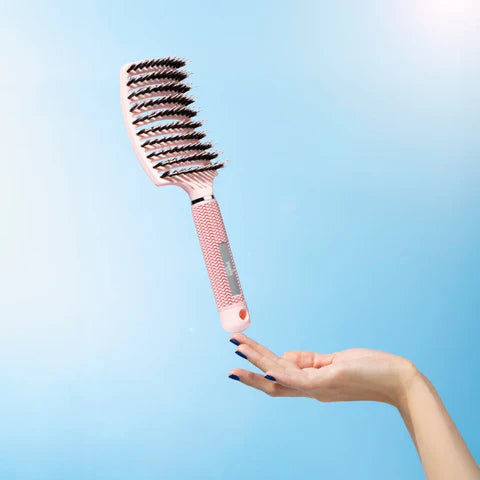
- Prepare the hair: Start with clean, detangled hair for the smoothest braiding experience. Brush thoroughly to remove knots or tangles. If desired, use a light styling product like mousse or spray to improve grip. This step helps keep the hair in place and reduces flyaways during braiding.
- Section hair at the crown: Take a small section of hair from the top of your head, starting at the crown. Divide this section into three equal parts—left, middle, and right. Make sure each part is as even as possible to maintain consistency throughout the braid.
- Begin braiding: Cross the right section over the middle section, making it the new middle. Next, cross the left section over the new middle section. This creates the initial structure of the braid. Keep a steady grip to ensure a neat start.
- Incorporate hair: Before each new cross, gather a small section of hair from the side you are working on. Add this new section to the strand you are about to cross over the middle. This process integrates hair gradually, forming the signature French braid look.
- Continue adding hair: Repeat the process, alternating sides and adding hair from each side as you move downward. Ensure you’re maintaining even tension and adding consistent amounts of hair to each section. This keeps the braid symmetrical and secure.
- Finish the braid: When you reach the nape of your neck and have incorporated all available hair, transition to a regular three-strand braid. Continue braiding the remaining hair until you reach the ends, then secure the braid with a hair tie or elastic band to prevent it from unraveling.
Tips for braiding your own hair: Using mirrors to view the back of your head is invaluable for monitoring progress and maintaining even sections. Positioning a hand-held mirror behind you while facing a larger mirror can help you spot unevenness and adjust as needed. Applying a light styling product can reduce flyaways, making the braiding process more manageable. Consistent practice is key—regularly working on your technique will enhance hand coordination and make each attempt smoother. Starting slow and gradually increasing speed will help build confidence in creating a neat, well-balanced braid.
Common mistakes to avoid: One of the most frequent mistakes when braiding is adding uneven sections of hair, which can result in a lopsided appearance. Consistent tension is crucial; varying the pressure can make parts of the braid appear loose or overly tight, leading to an uneven finish. Take your time and braid slowly—rushing can cause a messy or tangled result. Ensure each section is neatly incorporated, and don’t be afraid to pause and check your progress in a mirror. Practicing patience and precision will help you achieve a clean, balanced braid every time.
How to french braid your own hair: Double french braids (two sides)
Creating double French braids involves parting the hair down the middle and braiding each side symmetrically. This style is both practical and chic, perfect for workouts, casual outings, or adding a touch of elegance to your look. It keeps hair secure while showcasing a stylish appearance.
Step-by-step instructions:
- Part the hair: Begin by using a comb to create a straight center part, extending from your forehead to the nape of your neck. This will divide your hair into two equal sections. To keep things organized, clip or tie one side out of the way while you focus on braiding the other side.
- Prepare the first section: On the side you’re working with, take a small section of hair near your front hairline. Divide this section into three equal strands. Ensuring that the strands are even will make it easier to maintain a consistent braid.
- Begin braiding: Start the braid by crossing the right strand over the middle strand, then crossing the left strand over the new middle strand. This establishes the base structure of your braid and serves as the foundation for adding more hair.
- Incorporate hair: Before crossing each strand over again, add a small section of hair from the same side of the head to the strand you’re about to cross. This method gradually incorporates more hair into the braid, creating the signature French braid look. Continue adding hair and crossing over as you work your way down the side of your head.
- Continue braiding: Once you’ve incorporated all the hair on that side—typically by the time you reach the nape of your neck—transition to a regular three-strand braid. Continue braiding down the length of the hair.
- Secure the braid: Tie the end of the braid with a hair tie or elastic band to keep it in place.
- Repeat on the other side: Release the clipped section of hair and repeat the entire process on the opposite side to create a symmetrical double French braid look.
Tips for symmetrical braids: To achieve symmetrical braids, start by ensuring your center part is straight and even. Using a fine-tooth comb can help with precise parting. Maintain consistent tension while braiding each side to ensure both braids look uniform and balanced. Checking your progress with a mirror will help identify any unevenness and allow for adjustments as needed. Consistency in section size and tension throughout the process will enhance the overall symmetry of your braids, giving a polished, balanced look. Patience and attention to detail are key to mastering this style.
Securing the braids: Use small, clear elastic bands to secure the ends of the braids for a neat finish. If desired, you can pin the braids up or tuck them under each other at the back of your head for a different style.
How to Dutch braid your own hair
A Dutch braid, also known as a reverse French braid, is created by crossing hair strands under each other, giving a raised, standout effect. This bold braid style keeps hair secure while offering a striking, textured appearance, making it great for casual or active occasions.
Step-by-step instructions:
- Prepare the hair: Start by brushing your hair thoroughly to remove any tangles, as this will make the braiding process smoother. For better control and to reduce flyaways, you may slightly dampen your hair or apply a light styling product, such as mousse or a texturizing spray. This will help keep sections neat and manageable.
- Section the hair: At the crown of your head, gather a small section of hair. Divide this section into three equal strands, ensuring they are as even as possible. This initial division is key to creating a uniform braid.
- Begin braiding: Take the right strand and cross it under the middle strand. Then, take the left strand and cross it under the new middle strand. This underhand motion is what sets the Dutch braid apart, giving it a raised, textured appearance that stands out.
- Add hair: Before crossing the right strand under again, gather a small section of hair from the right side of your head and add it to the right strand. Then cross this combined strand under the middle.
- Repeat on the left: Gather a small section of hair from the left side of your head, add it to the left strand, and cross it under the middle. This process gradually incorporates more hair as you braid.
- Continue the pattern: Repeat the process of adding hair and crossing strands under, working your way down the back of your head. Ensure consistent tension to keep the braid looking even and secure.
- Finish the braid: Once all hair has been incorporated and you reach the nape of your neck, continue with a regular three-strand braid, crossing strands under as before.
- Secure the braid: Tie the end of the braid with a hair tie or elastic band to prevent it from unraveling. Adjust as needed for a polished look.
Comparison between Dutch and French braids: A French braid lies flat against the scalp, creating a sleek, seamless appearance. In contrast, a Dutch braid appears raised or embossed due to strands being crossed under the middle, resulting in a more prominent, three-dimensional effect. The Dutch braid’s standout texture makes it ideal for styles where the braid is intended to be a focal point, while the French braid offers a more subtle, classic look. Both techniques provide versatility but differ in their visual impact, making each suited to different styling preferences and occasions.
How to do a fishtail braid
The fishtail braid features a distinctive, intricate woven pattern that resembles fish scales. Though it looks complex, it's simple to achieve with practice. This braid adds a stylish, textured touch to any hairstyle, making it perfect for both casual and formal occasions.
Step-by-step instructions:
- Prepare the hair: Start by brushing your hair thoroughly to eliminate any knots or tangles. This will make the braiding process smoother. For added control, you can apply a light styling product, such as a mousse or spray, to help manage flyaways and provide better grip while braiding.
- Divide hair: Gather all of your hair and separate it into two equal sections, holding one section in each hand. Ensure that the division is as even as possible, as this will contribute to the overall uniformity of the braid.
- Begin braiding: Take a small strand of hair from the outer edge of the right section. Cross this strand over the right section and add it to the inner side of the left section. This is the first step in creating the fishtail braid’s signature woven look.
- Repeat on the left: Next, take a small strand of hair from the outer edge of the left section. Cross it over and add it to the inner side of the right section. Make sure to keep your grip firm to maintain an even braid.
- Continue the pattern: Alternate sides by repeating steps 3 and 4, taking small strands from the outer edges and crossing them over. Continue this process down the length of your hair. The smaller the strands you take, the more intricate and detailed the fishtail braid will appear.
- Secure the braid: Once you reach the end of your hair, use a hair tie or elastic band to secure the braid, keeping it in place. Adjust as needed for a polished finish.
Variations: To create a side fishtail braid, gather your hair over one shoulder before starting the braid. This style offers a casual, asymmetrical look. For a more relaxed appearance, gently tug on the edges of the braid after securing it to loosen it slightly, giving it a fuller and messier look.
Tips for beginners: Starting with your hair tied in a low ponytail can make managing the sections easier. Once comfortable, you can progress to braiding without the initial tie. If braiding behind your head, use a mirror to monitor your progress and ensure evenness. The fishtail braid may feel challenging at first, but with consistent practice, your speed and technique will improve.
Popular braid hairstyles
Braided hairstyles offer versatility and elegance, suitable for various occasions and hair types. Here are some popular braided styles:
Crown braid
The crown braid encircles the head, creating a regal and elegant appearance. This style is ideal for formal events such as weddings or proms. It works best on medium to long hair lengths and can be adapted for different hair textures. To create a crown braid, start by parting your hair down the middle and braiding each side. Then, lift each braid over your head, securing them with pins to form a halo effect.
Waterfall braid
The waterfall braid features strands cascading down, resembling a waterfall. This romantic style is perfect for casual outings or date nights. It suits medium to long hair and is particularly striking on wavy or curly textures. To create a waterfall braid, start with a section of hair near the front, divide it into three strands, and begin a standard braid. As you progress, drop the bottom strand after each crossover and pick up a new section of hair from above to continue the braid, allowing the dropped strands to fall, creating the waterfall effect.
Braided bun
Combining the sophistication of a bun with the intricacy of braids, the braided bun is versatile for both professional settings and formal occasions. Suitable for medium to long hair, this style can be tailored to various hair types. To achieve a braided bun, gather your hair into a high or low ponytail, braid the ponytail, and then wrap the braid around the base, securing it with pins to form a bun.
Milkmaid braids
Milkmaid braids involve creating two braids and then wrapping them over the top of the head, securing them in place. This vintage-inspired style is perfect for romantic occasions or themed events. It suits medium to long hair and can be adapted for different hair textures. To create milkmaid braids, part your hair down the middle, braid each section, and then lift each braid over your head, securing them with pins to form a halo effect.
FAQ about braids
How long does it take to master different braiding techniques?
The time it takes to master braiding varies for each person. With consistent practice, most people can become proficient in basic braids within a few weeks. More intricate braids may require additional practice and patience.
Can braiding damage my hair?
When done correctly, braiding is generally safe and can even protect your hair by reducing exposure to environmental stressors. However, braiding too tightly or leaving braids in for prolonged periods may cause tension or breakage, so always braid with care.
What products can help keep my braids neat?
Using styling products such as light hold sprays, mousse, or hair oils can help control flyaways and maintain a polished look. Slightly dampening hair before braiding can also improve grip and reduce frizz.
How do I make my braids last longer?
To make braids last longer, secure them with a strong elastic and use a lightweight hairspray to set the style. Sleeping with a silk scarf or pillowcase can also reduce friction and help maintain your braids overnight.
 2-4 day UK delivery
 25.000+ satisfied customers
 Satisfaction Guarantee


